Overview
Purpose: This guide explains how rental history is verified through landlord contact in Revela and how to manage the verification process.
Target Audience: Leasing agents, property managers, and admins.
Step-by-Step
Step 1: Applicant Provides Landlord Contact Information
-
During the application process, if an applicant lists a previous residence as a rental property (rather than an owned home), they will be prompted to enter their previous landlord’s contact information
-
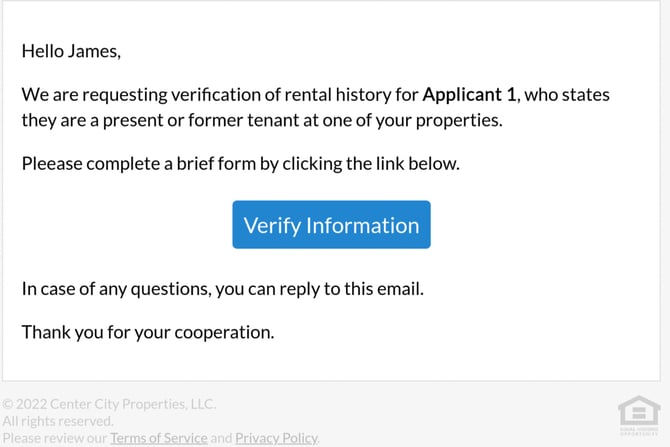
Once submitted, Revela automatically sends an email to the landlord to verify the email’s validity
Step 2: Landlord Verification Process
-
If the landlord’s email address is valid, the verification request is sent once the application is submitted
-
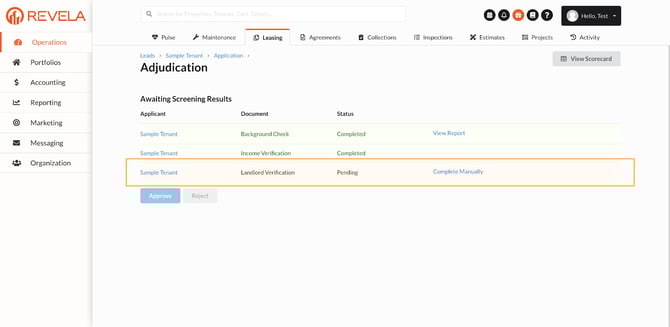
The request appears in the adjudication screen, highlighted in orange, indicating it is awaiting landlord response.
Step 3: Landlord Completes Verification
-
When the landlord accepts the verification request, they are redirected to a webpage and guided through a workflow
-
The workflow asks for the following details:
-
Monthly rent amount
-
Number of late payments
-
Move-in and move-out dates
-
Number of occupants
-
-
Upon completion, the adjudication screen will turn green, and all results will be available to review
Step 4: Accessing the Landlord Verification Report
-
Results are stored in the Landlord Verification Report under Reporting (left menu) > Leasing section > Landlord Verification
-
The report can be filtered by:
-
Timeframe
-
Status (All, Pending, Completed, Submitted, Skipped)
-
Step 5: Manual Entry & Skipping the Verification
-
Manual Entry: If a landlord provides verification via phone or email, the details can be manually entered into the adjudication screen
-
Skipping Verification: If the landlord does not complete the verification within the desired timeframe, it can be skipped using the Skip button on the adjudication screen. This allows the application process to move forward.
Best Practices, Tips, and Notes
-
Encourage applicants to provide accurate landlord contact information to avoid delays
-
Regularly monitor the adjudication screen to track pending verifications
-
If a landlord is non-responsive, follow up before choosing to skip the verification
Common Issues & Troubleshooting
Issue 1: Landlord did not receive the verification email
-
Solution: Confirm the email was entered correctly and check if it was flagged as spam
Issue 2: The adjudication screen does not update to green after landlord verification
- Solution: Refresh the page and check the Landlord Verification Report under Reporting