
Vendors in Revela represent any external person, company, or organization that provides services (e.g. maintenance, cleaning services, etc.) to your managed properties. From licensed contractors completing work orders to utility providers and legal firms, vendors are the foundation of your maintenance and accounts payable workflows.
Understanding how to set up and manage vendor records correctly ensures that invoices are processed on-time, payments are routed to the right party, and your organization maintains the documentation it needs for compliance, tax reporting, and audit readiness.
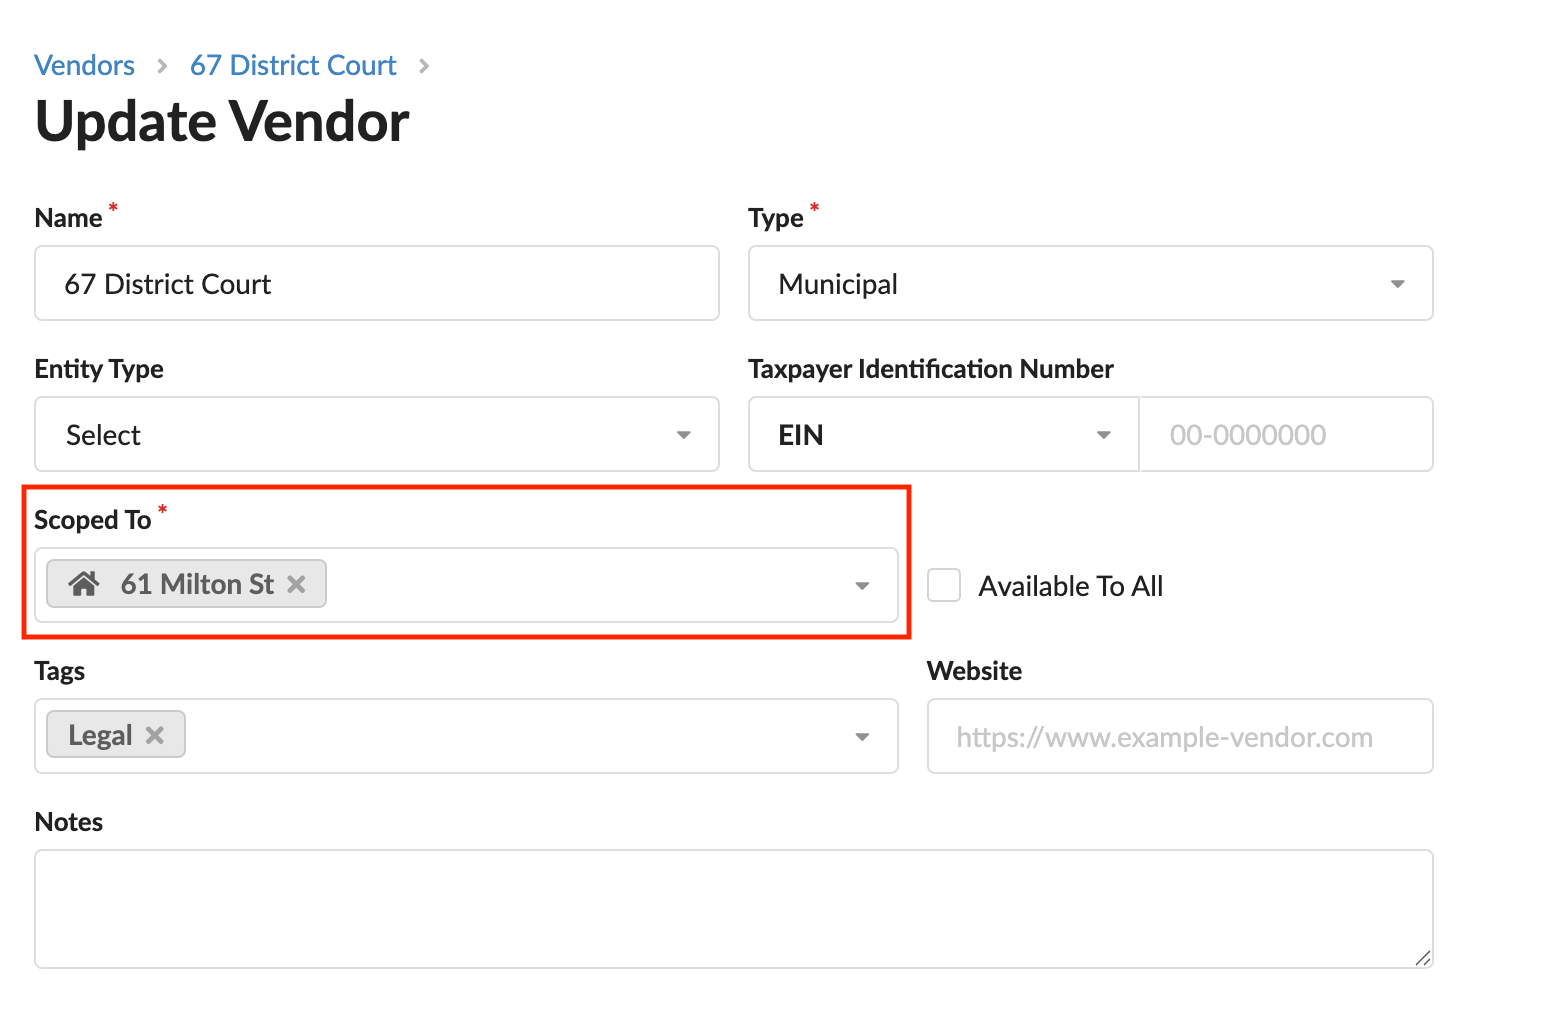
What Is a Vendor in Revela?A vendor record is a centralized profile that stores contact information, payment preferences, tax identification, insurance policies, contracts, and activity history for a single service provider. Revela uses this record as the payee whenever you create an invoice or process a payment within the Payables section of the Accounting module. Vendors are shared across your entire organization by default, meaning a single record can be referenced across multiple work orders, invoices, and contracts. If needed, you can scope a vendor to a specific property (or properties) directly from their record:
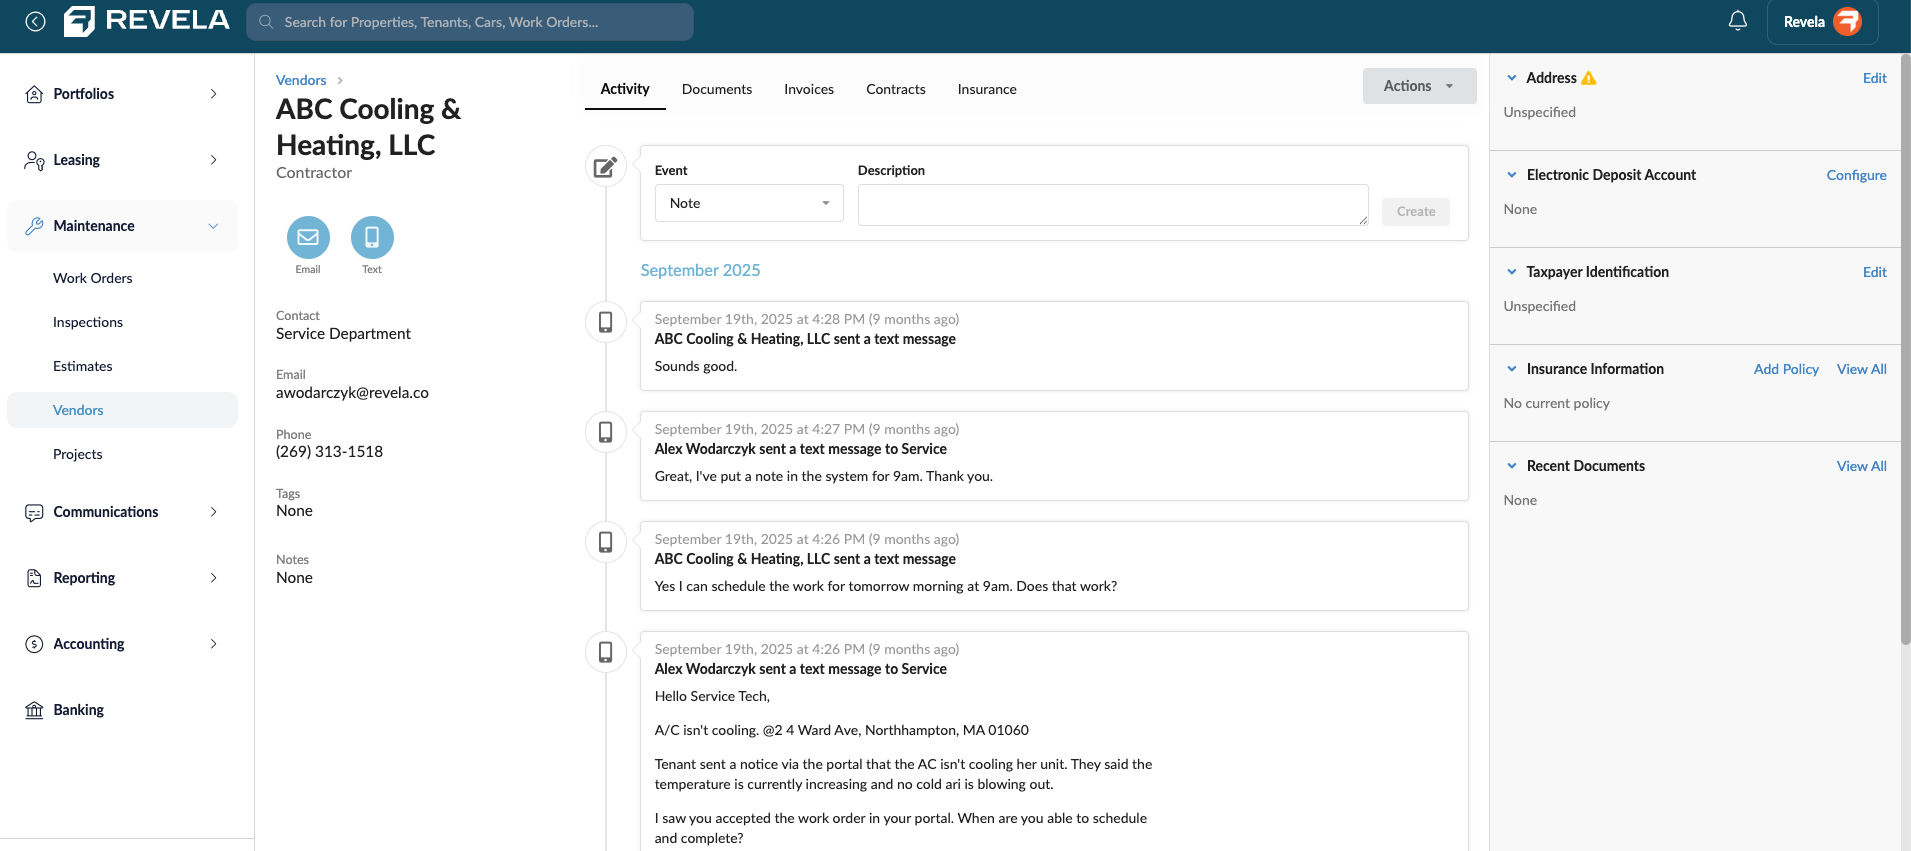
The vendor record is also the communication hub for that provider. You can send email and SMS messages directly from the vendor profile, and all outbound and inbound communications are logged chronologically in the Activity tab. This creates a single, searchable history of every interaction your team has had with that vendor.
Vendor TypesTo create a new vendor, navigate to Maintenance > Vendors. When you create a vendor, Revela requires you to assign a Vendor Type. The type categorizes the vendor for filtering and organizational purposes; it does not restrict what the vendor can do in the system. Options include:
- Contractor: These are vendors you work with on a day-to-day basis and are contracted through your organization. These are plumbers, electricians, landscapers, HVAC technicians, etc.
- Utility: These are utility providers such as electric, gas, or water companies whose invoices you track through Revela
- Financial: These can be financial services who invoice you such as a CPA firm, 1099 filing company, etc.
- Legal: These are legal entities who invoice you for services such as a law firm or attorney
- Municipal: These can be government entities you engage with during operations
Core Information
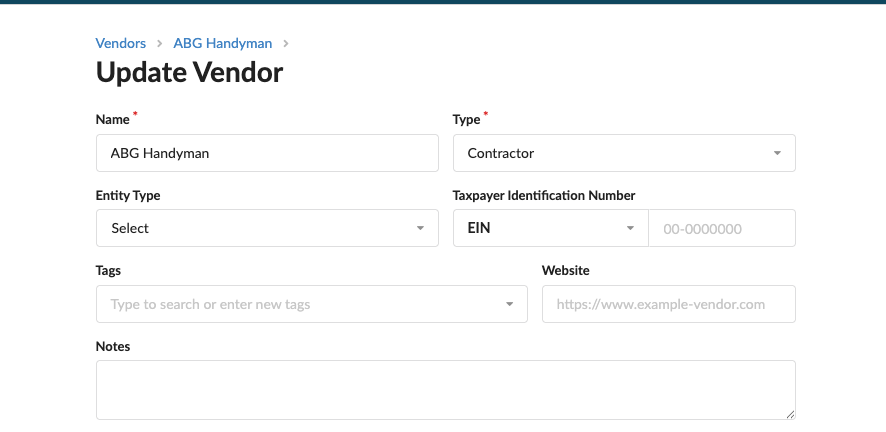
Every vendor record captures a Name, Type, and at least one contact. The contact section supports multiple entries, each requiring a first name, last name, email address, and phone number. This allows you to store separate contacts for billing, service dispatch, or account management within a single vendor record rather than creating duplicate vendor profiles.
Additional fields include Tags, which you can use to label vendors with custom categories such as a trade specialty or service region, and Notes, a free-text field for any internal information your team needs to track. The Website field is optional and is available for reference purposes only.
Taxpayer Identification
The Taxpayer Identification section on the vendor profile stores the vendor's tax identification number (TIN) alongside their entity type. For example, an Employer Identification Number (EIN) for a business or a Social Security Number (SSN) for an individual contractor. Revela uses this information when generating 1099 forms at year end. If a vendor's taxpayer identification is not entered, Revela will flag the record as unspecified, and that vendor will not be included in your 1099 filings until the information is provided.
Navigate to Accounting > 1099s to review which vendors are eligible for a 1099 and to manage your year-end tax filings. Keeping taxpayer identification current throughout the year prevents delays when tax season arrives.
Accounts Payable Settings
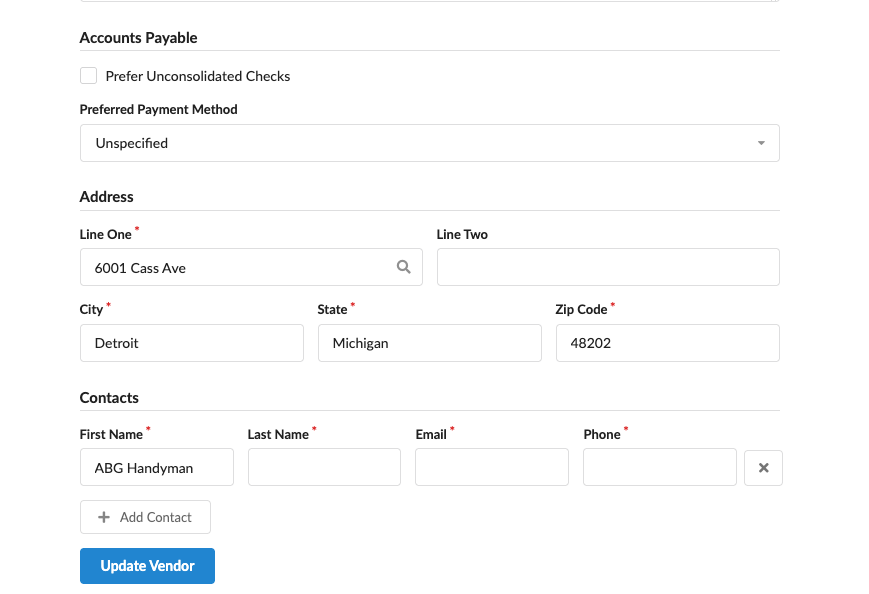
The Accounts Payable section controls how Revela handles payment processing for the vendor. The Preferred Payment Method field lets you designate how the vendor prefers to be paid. Check and electronic transfer (ACH) are the most common payment options. The Prefer Unconsolidated Checks checkbox instructs Revela to issue a separate check for each invoice rather than combining multiple invoices into a single payment run. This setting is useful for vendors who require itemized remittances or whose invoices must be charged to separate owner accounts.
Revela will apply these preferences automatically when you pay invoices from Accounting > Payables. You can override them on any individual payment if a specific transaction requires a different approach.
Electronic Deposit Account
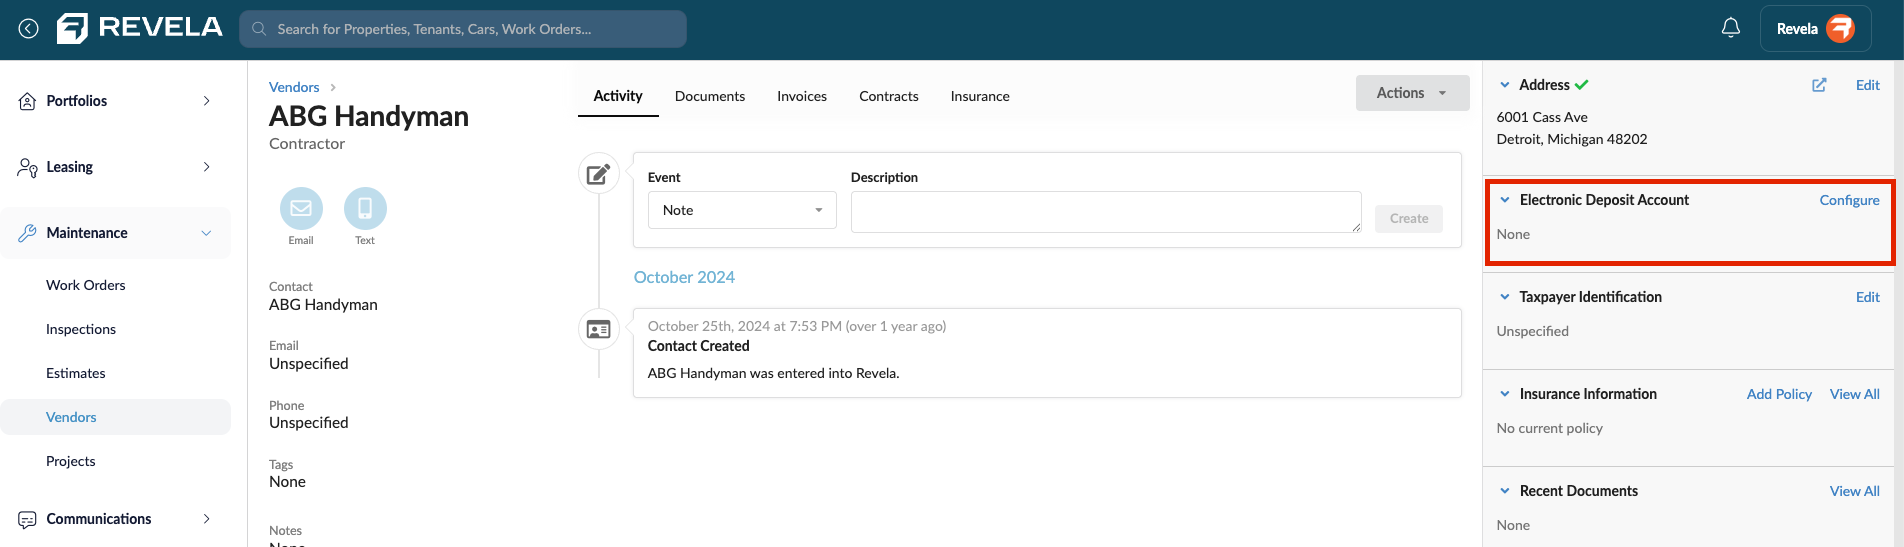
The Electronic Deposit Account panel on the vendor profile allows you to configure the vendor's bank account information for electronic transfer (ACH) payments. Click Configure to enter the vendor's routing number and account number. Once saved, Revela will use this account whenever an ACH payment is initiated for that vendor. The address on file must be verified before electronic payments can be processed, which is why Revela flags an unverified address with a warning indicator on the profile.
Address
The vendor's mailing address is used for check payments and is referenced when mailing any correspondence. Revela verifies addresses against postal records and flags unverified entries with a warning. Click Edit in the Address panel and update or confirm the address to resolve the verification warning. An unverified address will not prevent you from saving the vendor record, but it may cause issues if you attempt to send a physical payment.
Tabs on the Vendor ProfileActivity
The Activity tab displays a chronological log of every event associated with the vendor, including notes your team has added, emails sent, phone calls logged, text messages exchanged, and system-generated entries such as when the contact was first created. You can add a new activity record at any time by selecting an event type from the dropdown and entering a description. This tab is the primary record of your team's relationship with a vendor and should be used consistently so that communication history is never lost.
Documents
The Documents tab stores files attached to the vendor record, such as W-9 forms, license copies, or service agreements. Click the upload area or drag a file onto the drop zone to add a document. Documents stored here are accessible to anyone on your team with permission to view the vendor record.
Invoices
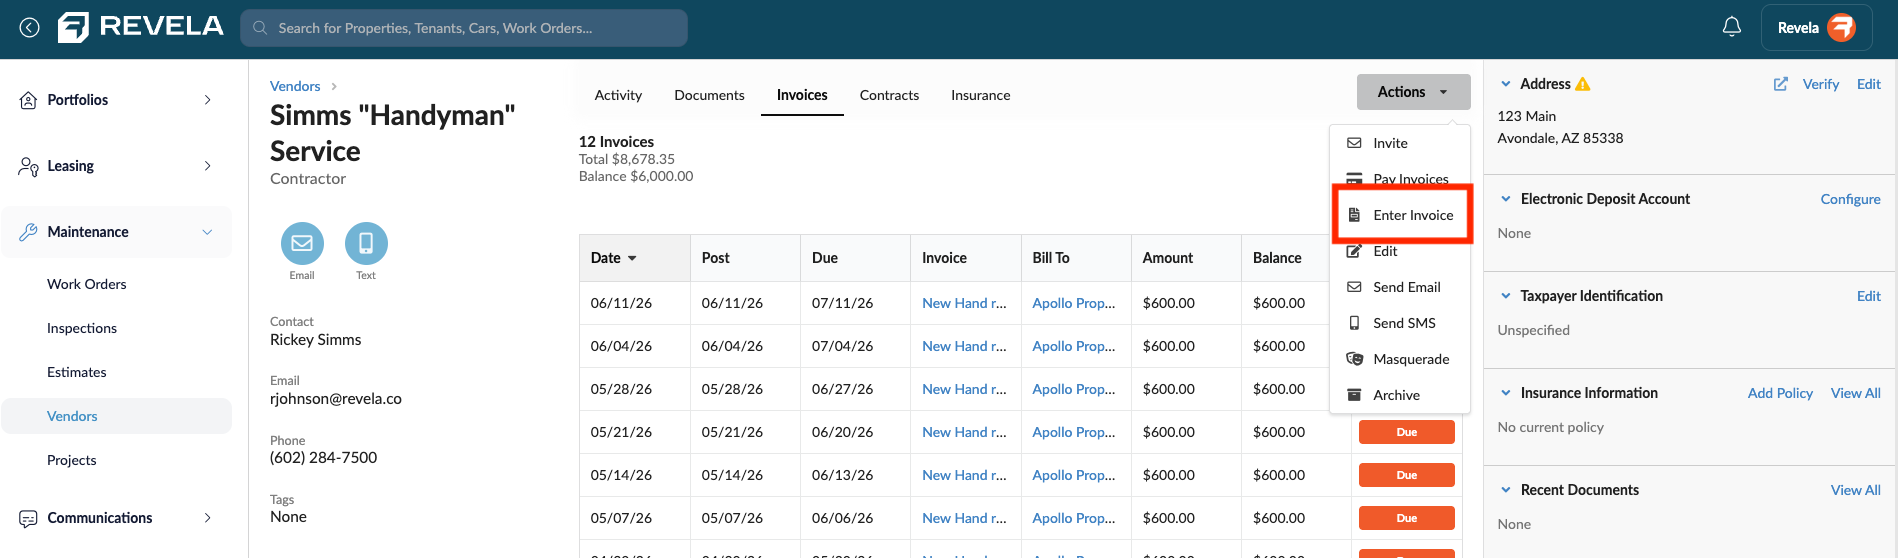
The Invoices tab shows all payable invoices that have been entered in Revela and attributed to this vendor. Revela pulls this data from Accounting > Payables, so you do not enter invoices directly from the vendor profile — the Invoices tab is a read-only view of that vendor's invoice history. To enter a new invoice, select Actions > Enter Invoice from the vendor profile, which will route you to the invoice creation form with the vendor pre-populated as the payee.
Contracts
The Contracts tab allows you to track formal agreements between your organization and the vendor. When you add a contract, you can associate it with specific properties, enter start and end dates, attach a document, and add notes. Revela does not automatically enforce contract terms or send renewal reminders, so this tab is best used as a reference and document repository rather than a contract management system. Your team is responsible for monitoring contract expiration dates independently.
Insurance
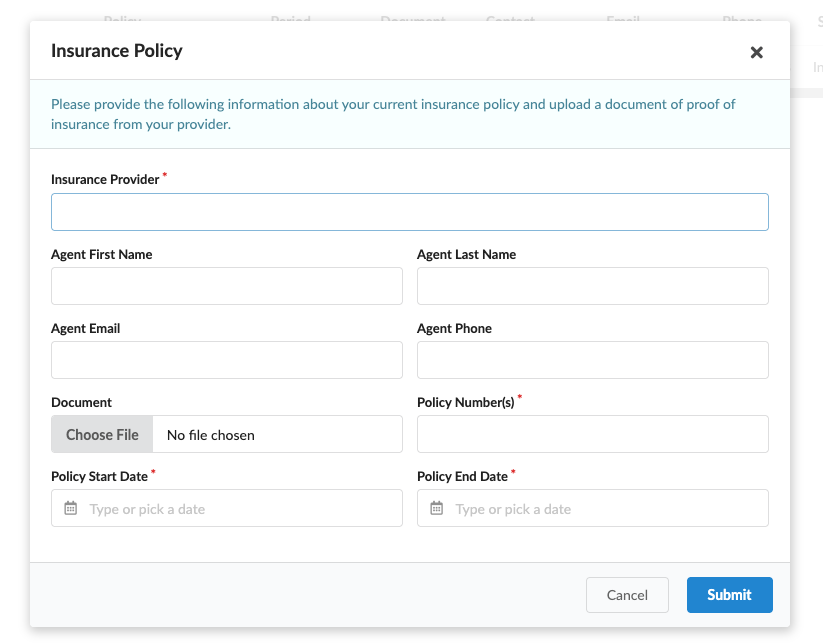
The Insurance tab stores the vendor's certificate of insurance information, including the insurance provider, agent contact details, policy number, and policy start and end dates. Click Add Policy to enter a new policy. Revela does not automatically verify or validate insurance coverage; it records what you enter and stores the associated document for your reference. You are responsible for reviewing and confirming that coverage is current before assigning the vendor to a work order.
Vendors are referenced at several points across Revela. In Maintenance, a vendor can be assigned to a work order so that the service provider receives notification and can communicate with your team directly. In Accounting, vendors appear as payees when you create invoices in Payables and process payments in Accounting > Payments. In Accounting > 1099s, vendors with a stored taxpayer identification number and qualifying payments are included in year-end tax filings.
Because the vendor record is shared across all of these workflows, it is important to maintain accurate and complete vendor profiles. An incomplete address, a missing TIN, or an outdated contact email can create friction at any of these downstream steps.
Vendor Portal AccessRevela allows you to invite vendors to a vendor portal where they can receive work orders, update job status, and communicate with your team. Select Actions > Invite from the vendor profile to send a portal invitation to one or more of the vendor's contacts. Once a contact has an active portal account, they will appear in the vendor portal invite list as already registered and cannot be re-invited.
Portal access is optional. You do not need to invite a vendor to the portal in order to assign them to work orders or process payments on their behalf. However, enabling portal access reduces the need for manual status updates and keeps your team's communication centralized within Revela.
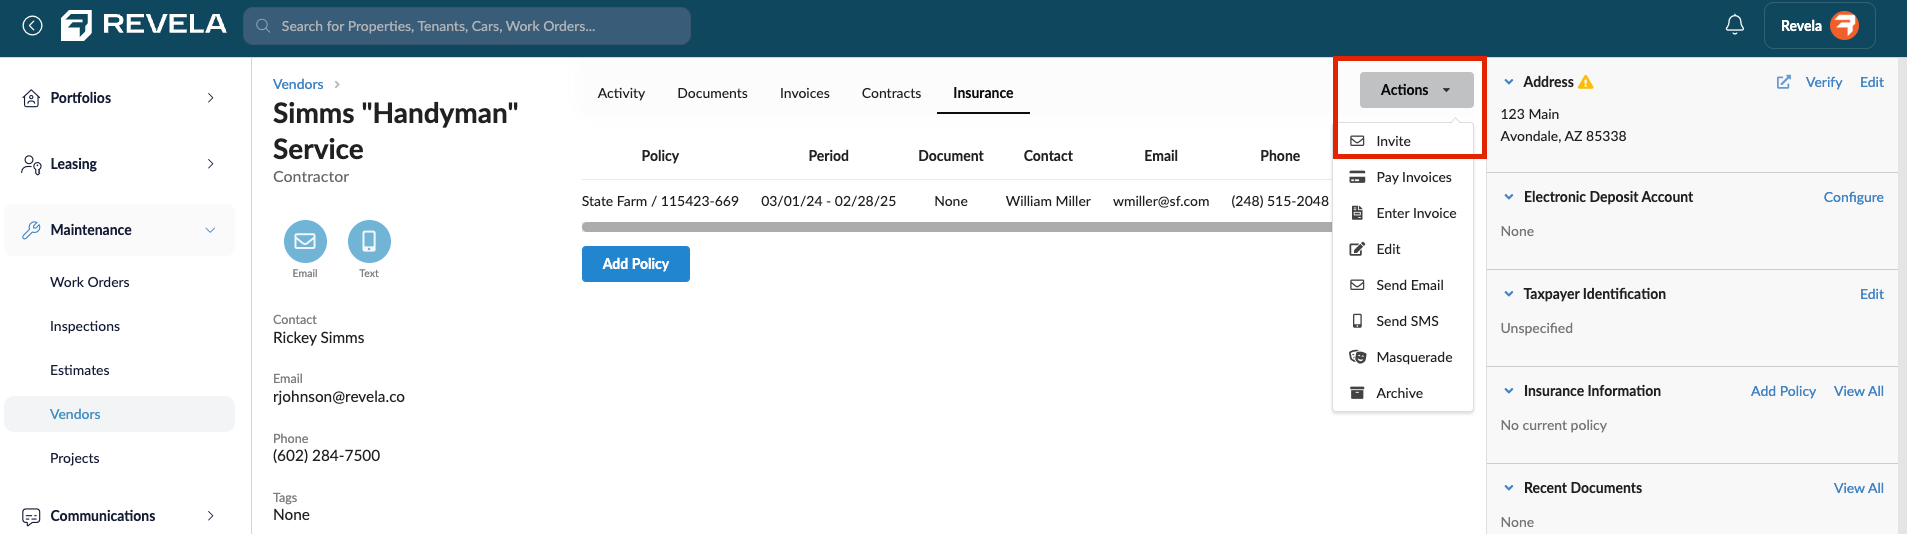
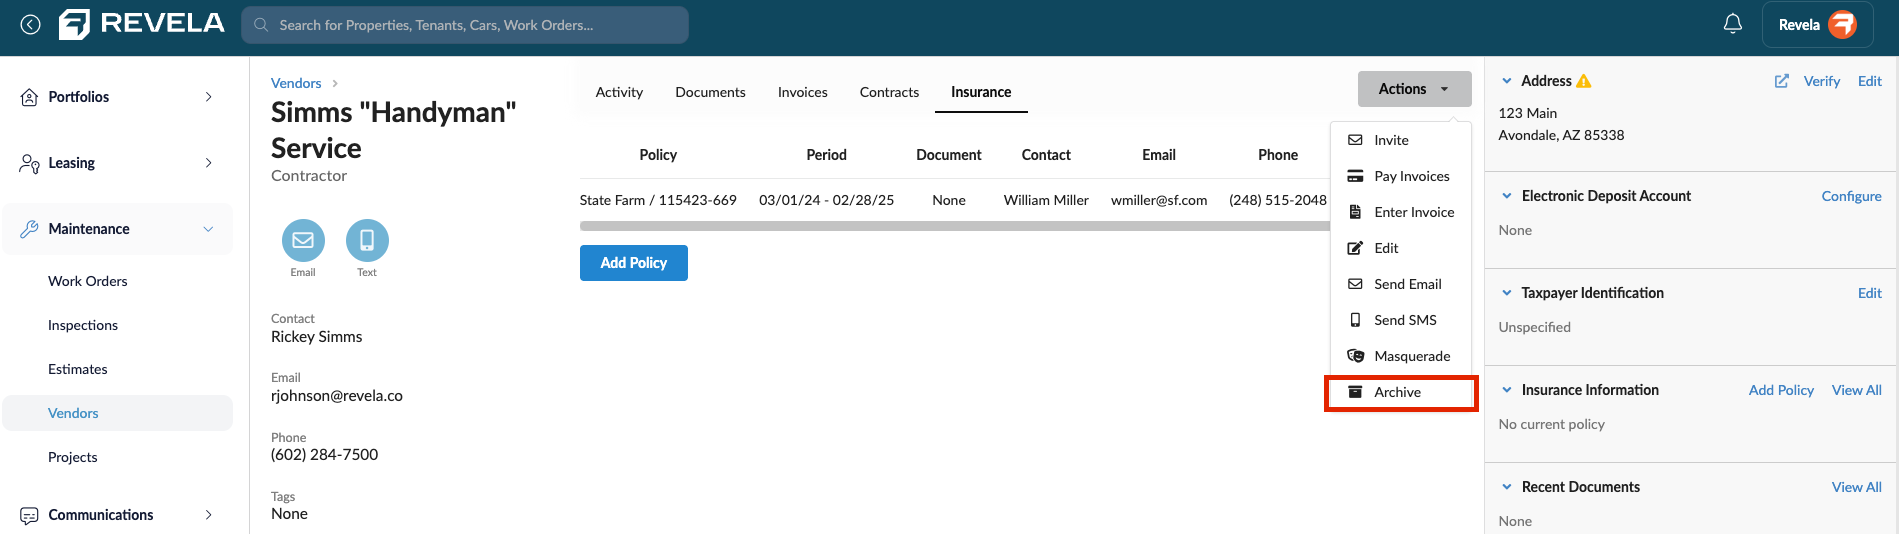
If your management company no longer has a relationship with a vendor, select Actions > Archive from their profile to remove them from your active vendor list. Archived vendors are hidden from the default Vendors list view but can be retrieved by enabling the Show Archived Records option in the search bar. Archiving does not delete any associated invoices, payments, or historical activity; it simply prevents the vendor from appearing in active workflows and dropdown selections.
- Complete the taxpayer identification and mailing address fields at the time you create the vendor, not after the first invoice. Incomplete records at invoice time slow down payment processing and create last-minute scrambles during 1099 filing season.
- Use Tags consistently across your vendor list to make filtering fast and reliable. For example, tagging vendors by trade (e.g. "HVAC," "Plumbing," "Electrical") allows you to filter the vendor list quickly when assigning a vendor to a work order for a specific type of repair.
- Avoid creating duplicate vendor records. If a vendor already exists in Revela, use the search bar on the Vendors list page to confirm before adding a new record. Duplicate vendors lead to split invoice histories, incorrect 1099 reporting, and confusion in payment runs.
- Store insurance certificates in the Insurance tab and set a reminder outside of Revela to review expiration dates before they lapse. Because Revela does not send automated insurance expiration alerts, a manual process or an external calendar reminder is necessary to keep coverage current.
- Do not use the vendor record for employees or internal staff members. Internal payees should be managed through Setup > Employees to ensure correct payroll and access management.
- Do not archive a vendor if they have open invoices or active work orders. Resolve all pending items before archiving to ensure your accounting records remain accurate.