When a resident’s tenancy ends, Revela provides a structured move-out workflow to formally close the lease, reconcile any outstanding balances, and return the unit to an available status. Understanding this process ensures that your records remain accurate, your security deposit handling stays compliant, and your unit is ready for re-leasing without delay.
The move-out process touches several areas of the platform (lease record, resident ledger, security deposit account, and your vacancy reporting). Completing each step in the correct order is important, as actions taken during move-out directly affect how charges and credits are reflected across these areas.
Before You Begin
Before initiating a move-out, confirm that the resident’s ledger is current and that all recurring charges have been posted through the move-out date. Review any open invoices, unpaid balances, or pending credits that will need to be addressed as part of the move-out disposition. Skipping this review can result in ledger discrepancies that are difficult to resolve after the lease has been closed.
Confirm the correct move-out date with the resident before proceeding. Revela will use this date to calculate the prorated rent charges and to determine the timeline for security deposit return, which may be governed by state or local law.
Initiating the Move-Out
Navigate to the Resident’s Lease and select Actions > Move Out.
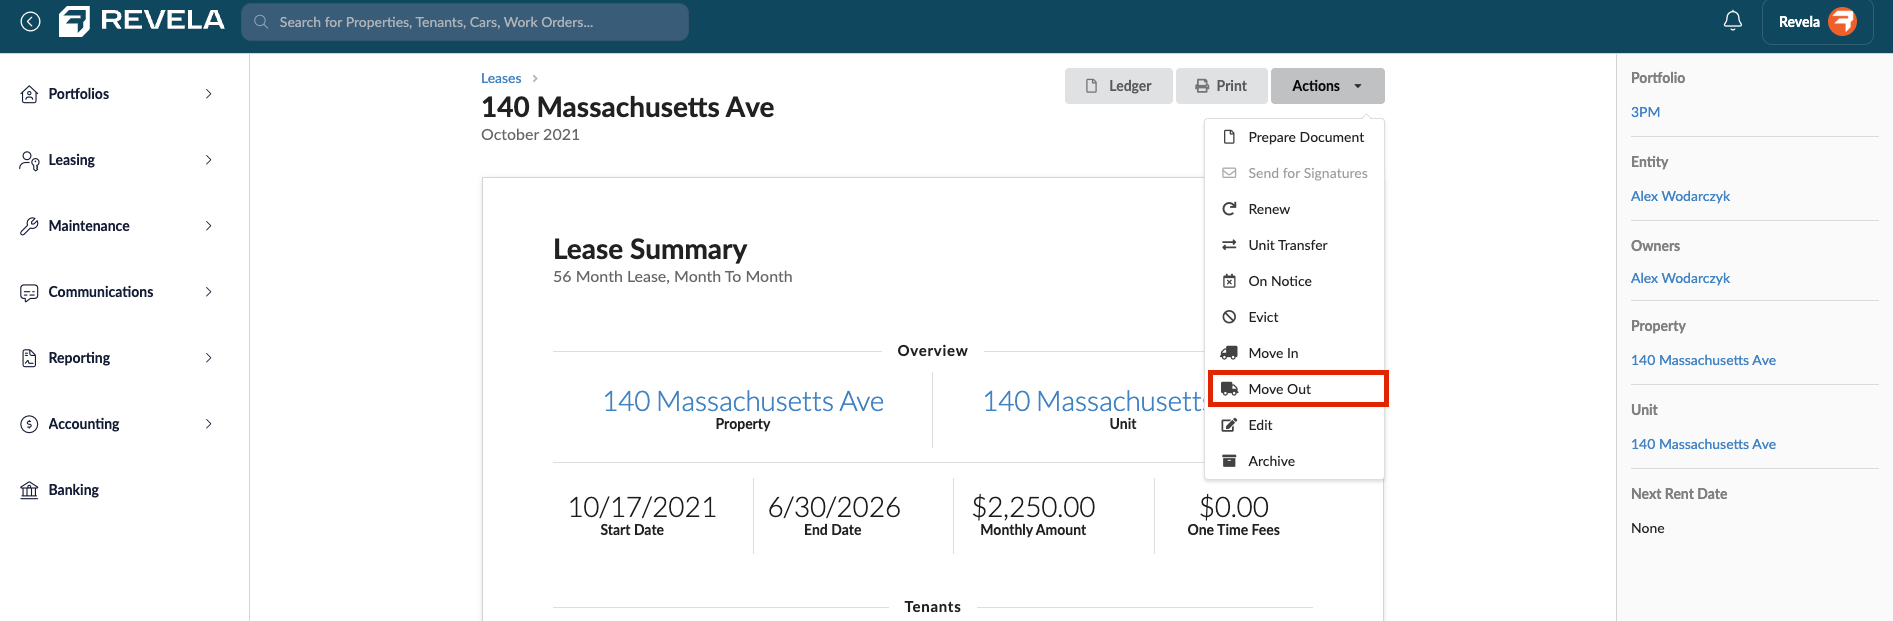
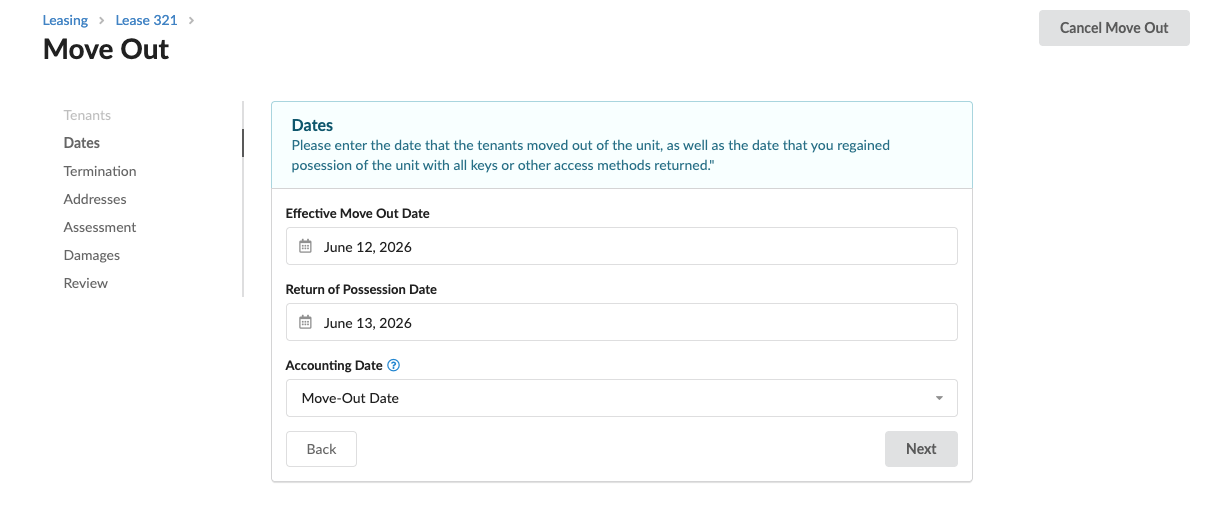
Ensure the correct tenants are selected as part of the move out and click Next. On the next screen you will enter the effective move-out date as well as the date at which the unit is returned to your possession.
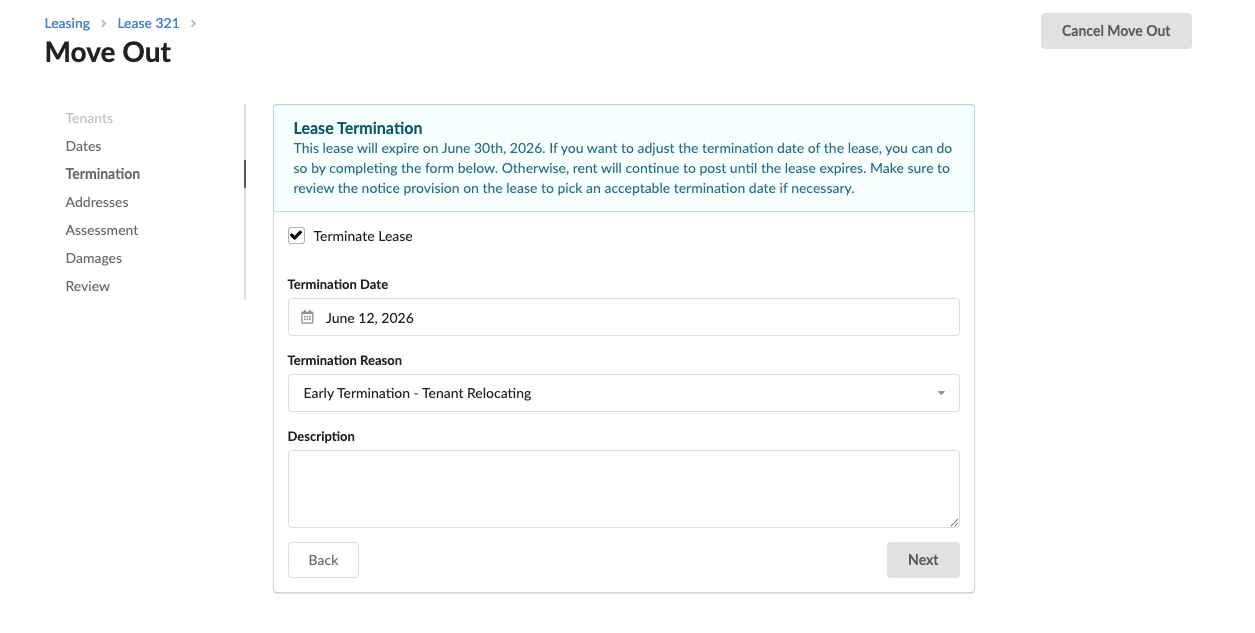
If a resident is ending their agreement early, you can terminate the lease so that the unit can be available for leasing before the original expiration date of the current lease. Click the Terminate Lease checkbox and enter the appropriate termination information on the screen (termination date, termination reason, any additional notes).
Enter a forwarding address for returned deposits, additional bills, or other communications for the resident moving out and click Next.
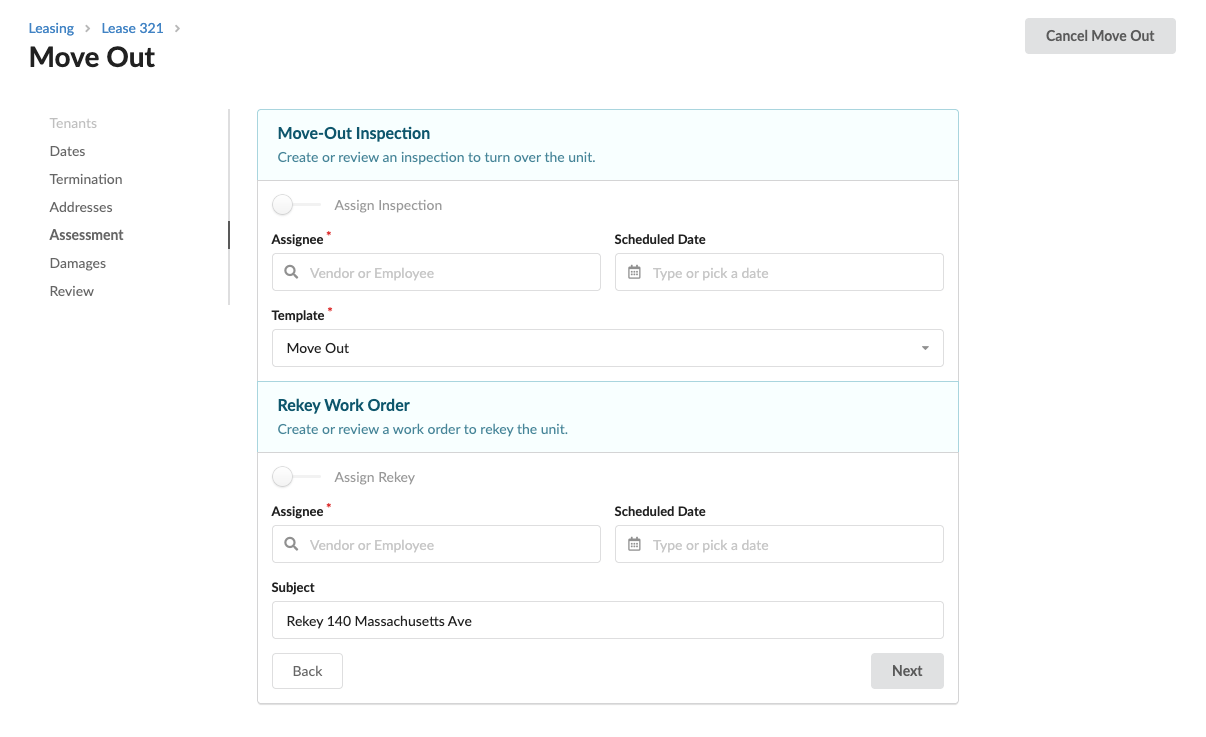
If you are completing a move-out inspection, complete the information in the Assessment screen. This will allow the manager to assign the move-out inspection to a vendor or employee with a scheduled date for completion. You can also create a work order for the unit to be rekeyed by an employee or vendor as well.
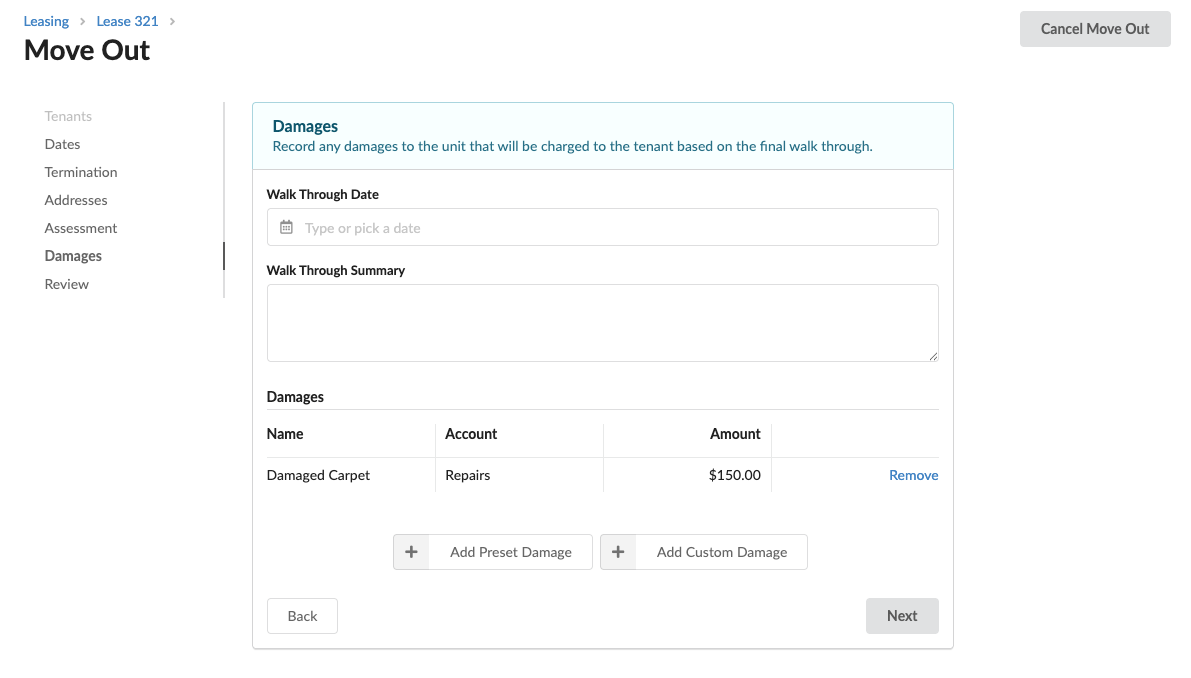
Record any damages to the unit that will be charged to the resident based on the final walk through of the unit.
Select Add Preset Damage for any pre-assigned damage charges your organization has created. Otherwise, select Add Custom Damage to select the appropriate GL Code, amount, and damage description.
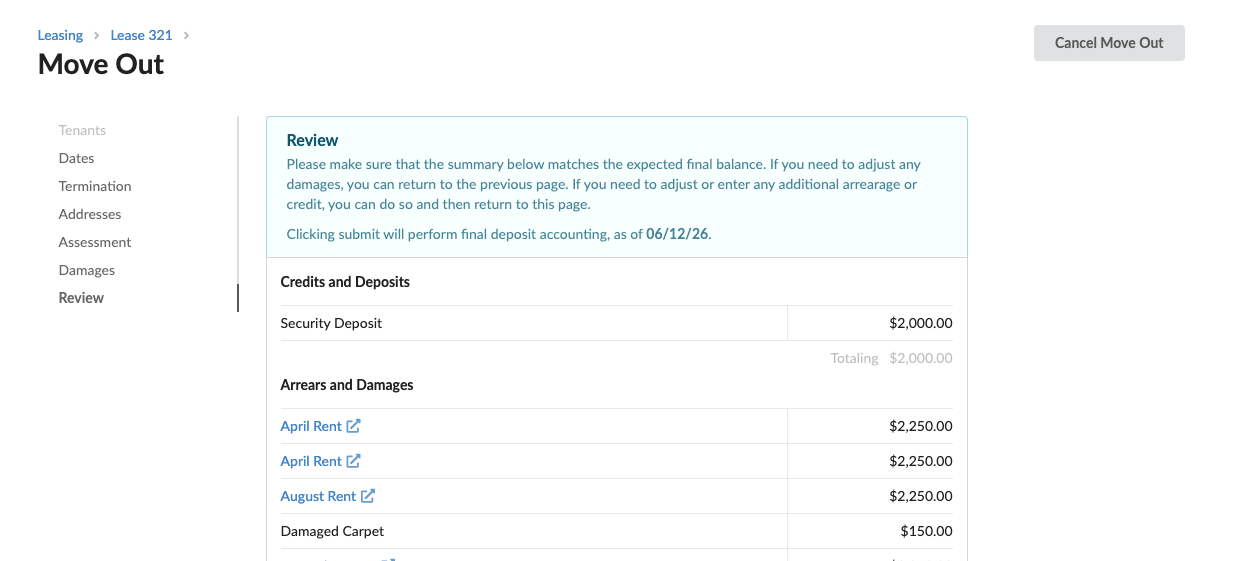
Lastly, review the summary and ensure it matches the expected final balance. If you need to adjust any damages, you can return to the previous page. If you need to adjust or enter any additional arrearage or credit, you can do so and return to the move-out page.
The Amount Owed to Tenant shows the refund amount if credits exceed the charges assigned. The Amount Owed to Landlord shows the balance due by the resident if charges exceed the resident’s credits.
Clicking submit will perform the final deposit accounting as of the effective date you originally chose. Revela will automatically convert the security deposit into a usable credit, apply all available credits to outstanding charges, and create a refund payable invoice for any remaining credit balance.
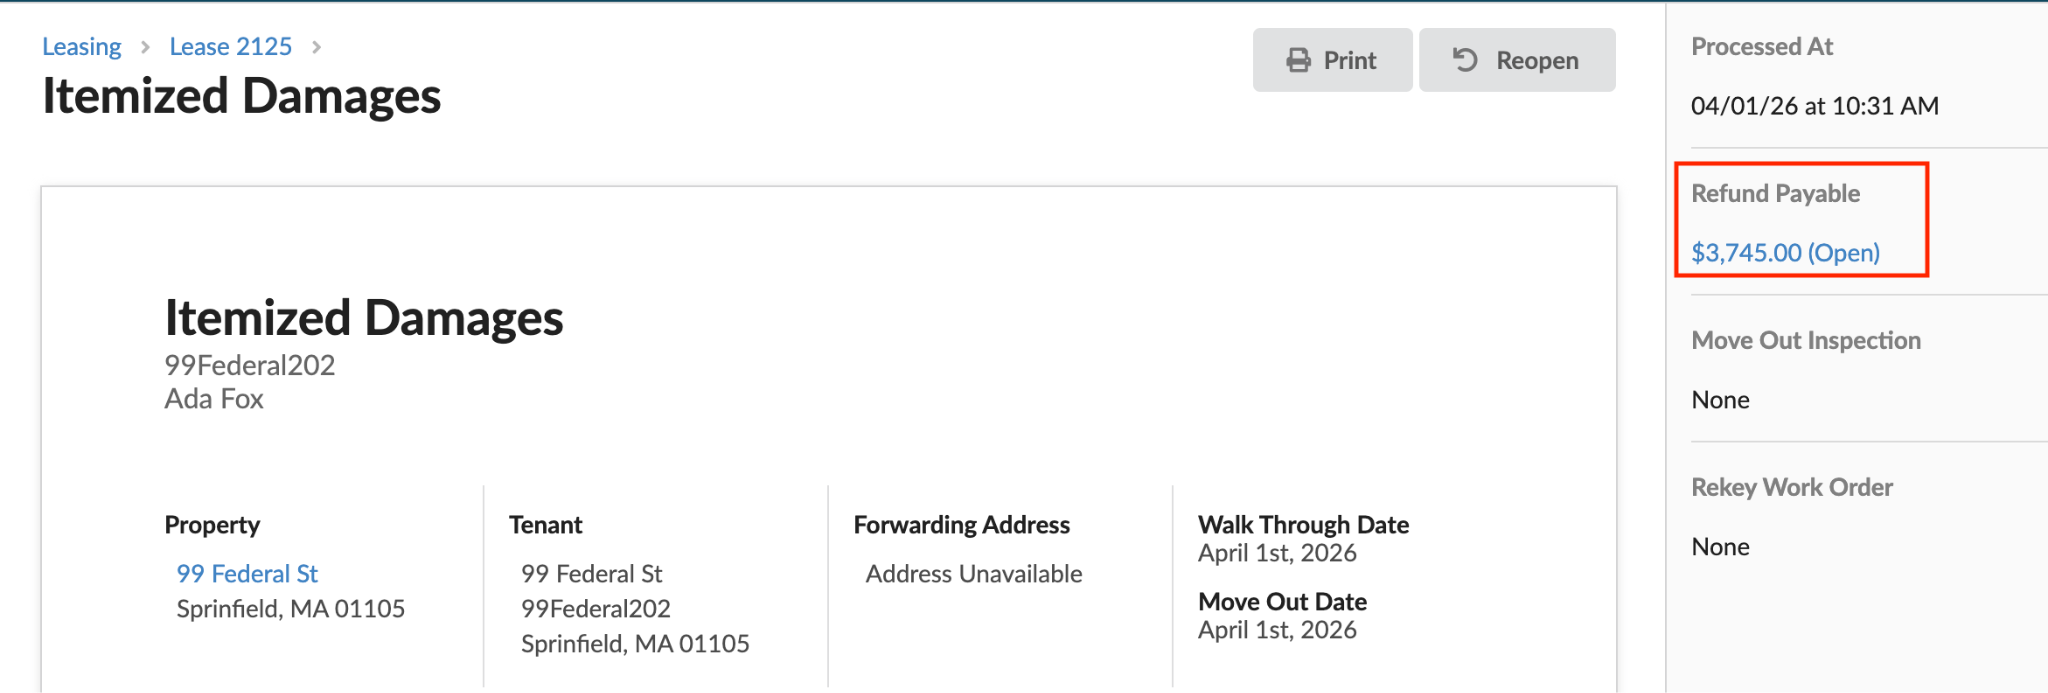
The sidebar displays the Refund Payable for the remaining credit balance amount.
- A Paid status indicates the refund payment has been made.
- An Open status indicates the refund has not yet been paid.
Paying the Security Deposit to the Resident
On the Itemized Damages summary, you can click the open Refund Payable to instantly navigate to the open invoice. Alternatively, you can navigate to Accounting > Payables to locate the refund payable invoice. Select Actions > Pay to release the security deposit to the resident.
You can also add this invoice to a Payables Batch for future processing (in bulk) by selecting the checkbox next to the invoice and selecting Add to Batch in the white bar at the top of your Payables section.
If this has been paid outside of Revela, select Actions > Mark Paid to mark the invoice as paid externally.
Re-Opening the Move-Out
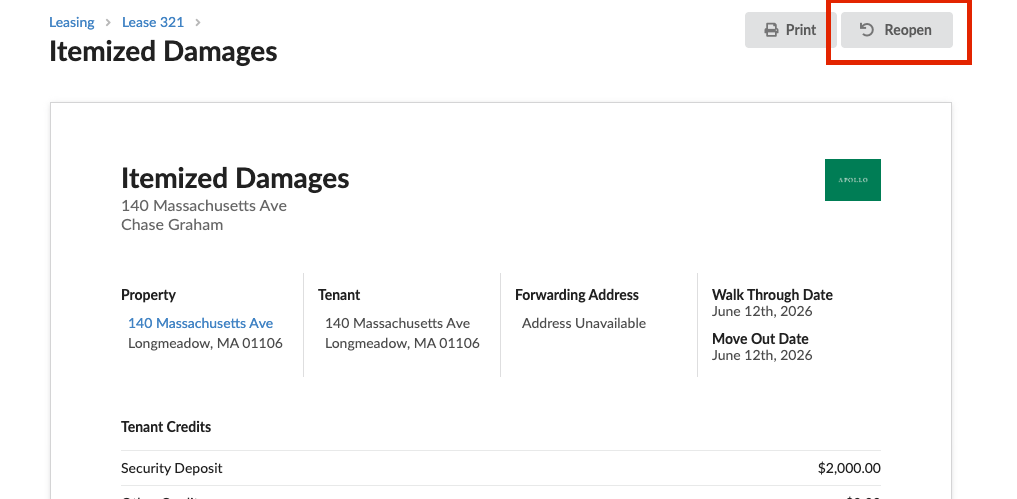
If you need to correct the refund amount or make changes after a move-out has been processed, you can re-open this by navigating to the Itemized Damages section.
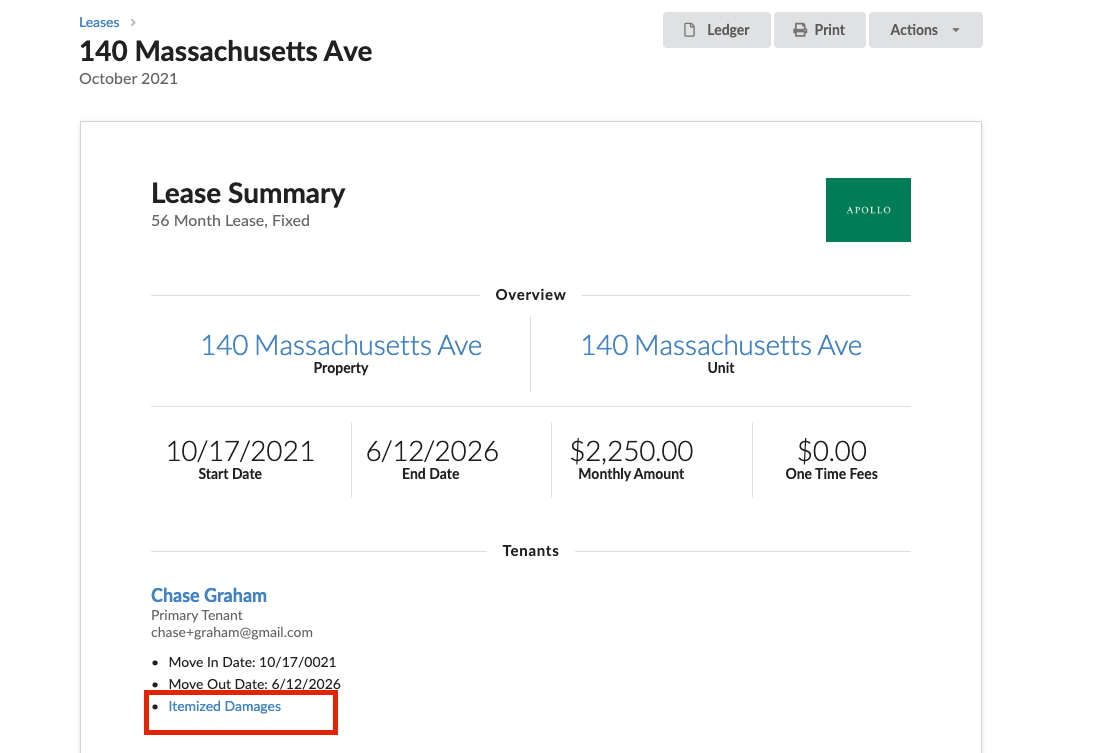
Click the Itemized Damages link under the resident’s name on their lease summary page. Click the Reopen button at the top of the Itemized Damage Section which will re-open the move-out and allow you to make any necessary changes.
Reflecting the Paid Security Deposit on the Owner Statement
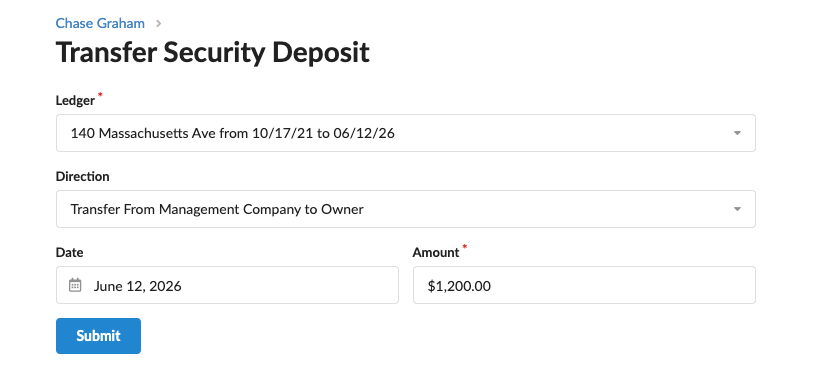
If a security deposit should be released to the owner, or the owner pays the security deposit to the organization, you can reflect this on the owner statement. Navigate to the resident’s profile and select Actions > Transfer Deposit.
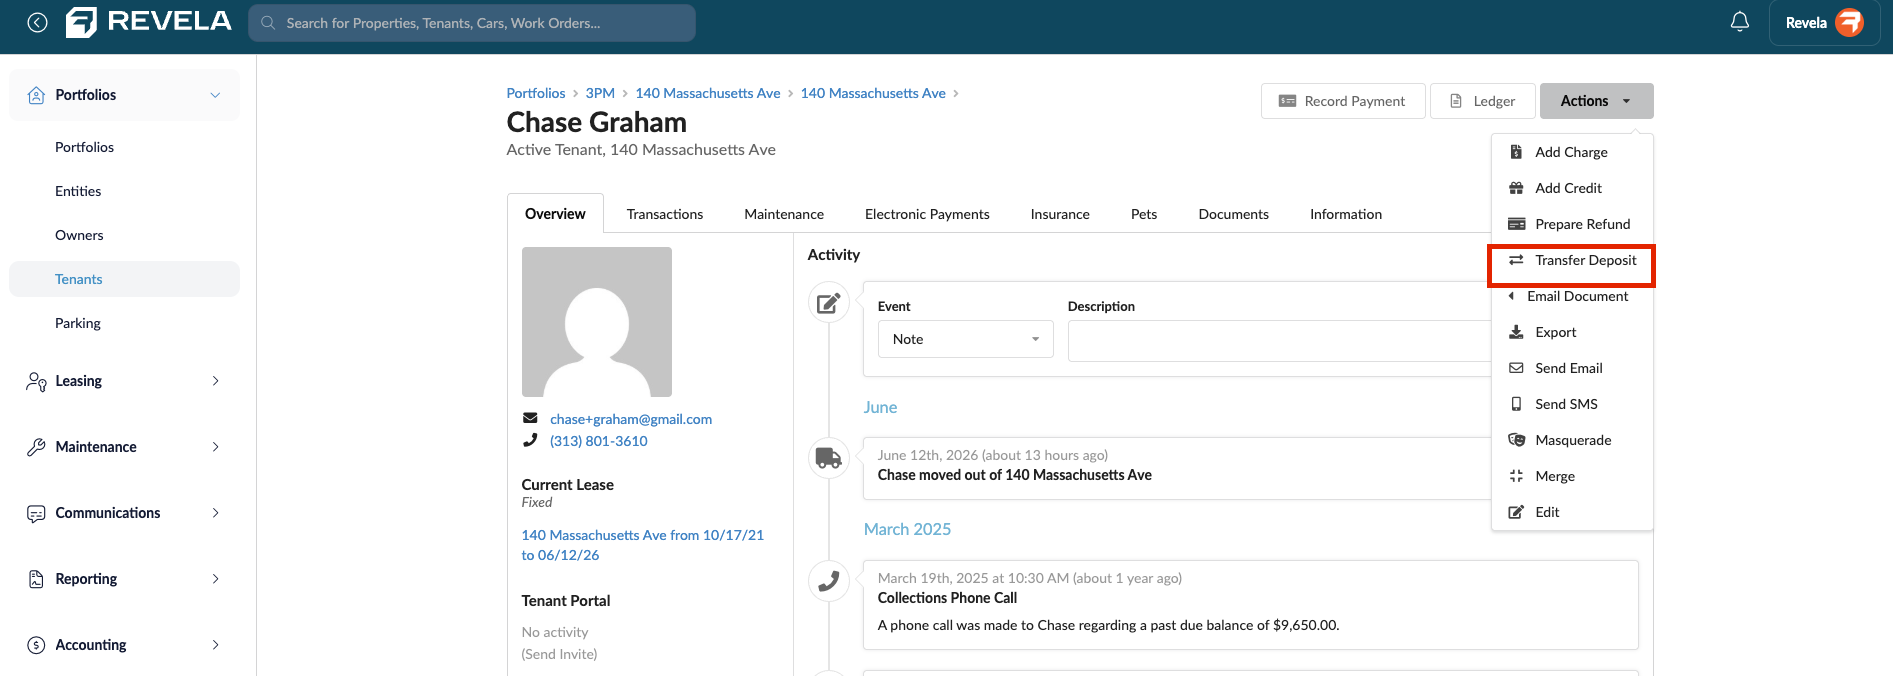
Enter the correct amount that should be transferred and to which party:
- Transfer From Management Company to Owner = the Organization releasing the security deposit to the Property Owner
- Transfer From Owner to Management Company = the Owner paying the security deposit to the Management Company