
Bank reconciliation is the process of matching your internal accounting records in Revela against the transactions reported on your bank statement. The goal is a zero difference: every dollar accounted for, every discrepancy identified. Completing reconciliations regularly is one of the most effective controls available for maintaining the integrity of your financial data.
Starting a New Reconciliation
To begin, navigate to Banking, select the bank account you want to reconcile, then click the Actions dropdown in the top right corner and select Reconcile.
This opens the Bank Reconciliation workflow. Before proceeding, confirm that the Statement Beginning Balance shown in Revela matches the beginning balance on your bank statement. The form includes the following fields:
- Last Reconciliation Date — Shows the statement date from your most recently completed reconciliation. If this is your first time reconciling the account in Revela,
- "No Reconciliation on File" will be shown.
- Statement Date — Enter the ending date of the bank statement you are reconciling against (for example, January 31, 2026).
- Statement Beginning Balance — Automatically populated from the ending balance of your previous reconciliation. If this is your first reconciliation, it defaults to $0.00 and cannot be edited.
- Statement Ending Balance — Enter the ending balance shown on your bank statement.
- Statement File — Optionally upload a copy of your bank statement for your records. The file will be available for download from the reconciliation detail page later.
- Service Charges — Enter any bank fees charged during the statement period. When an amount is entered, a Service Charge Account dropdown appears — select the appropriate expense account to record the fee against.
- Interest Earned — Enter any interest your bank paid during the statement period. When an amount is entered, an Interest Account dropdown appears — select the appropriate revenue account to record the interest income against.
Once all fields are complete, click Next to create the reconciliation and move to the clearing workspace. If you entered service charges or interest, Revela automatically creates the corresponding journal entries dated on the statement date. If a reconciliation is already in progress for this account, you will be redirected to the existing reconciliation instead.
Clearing Transactions
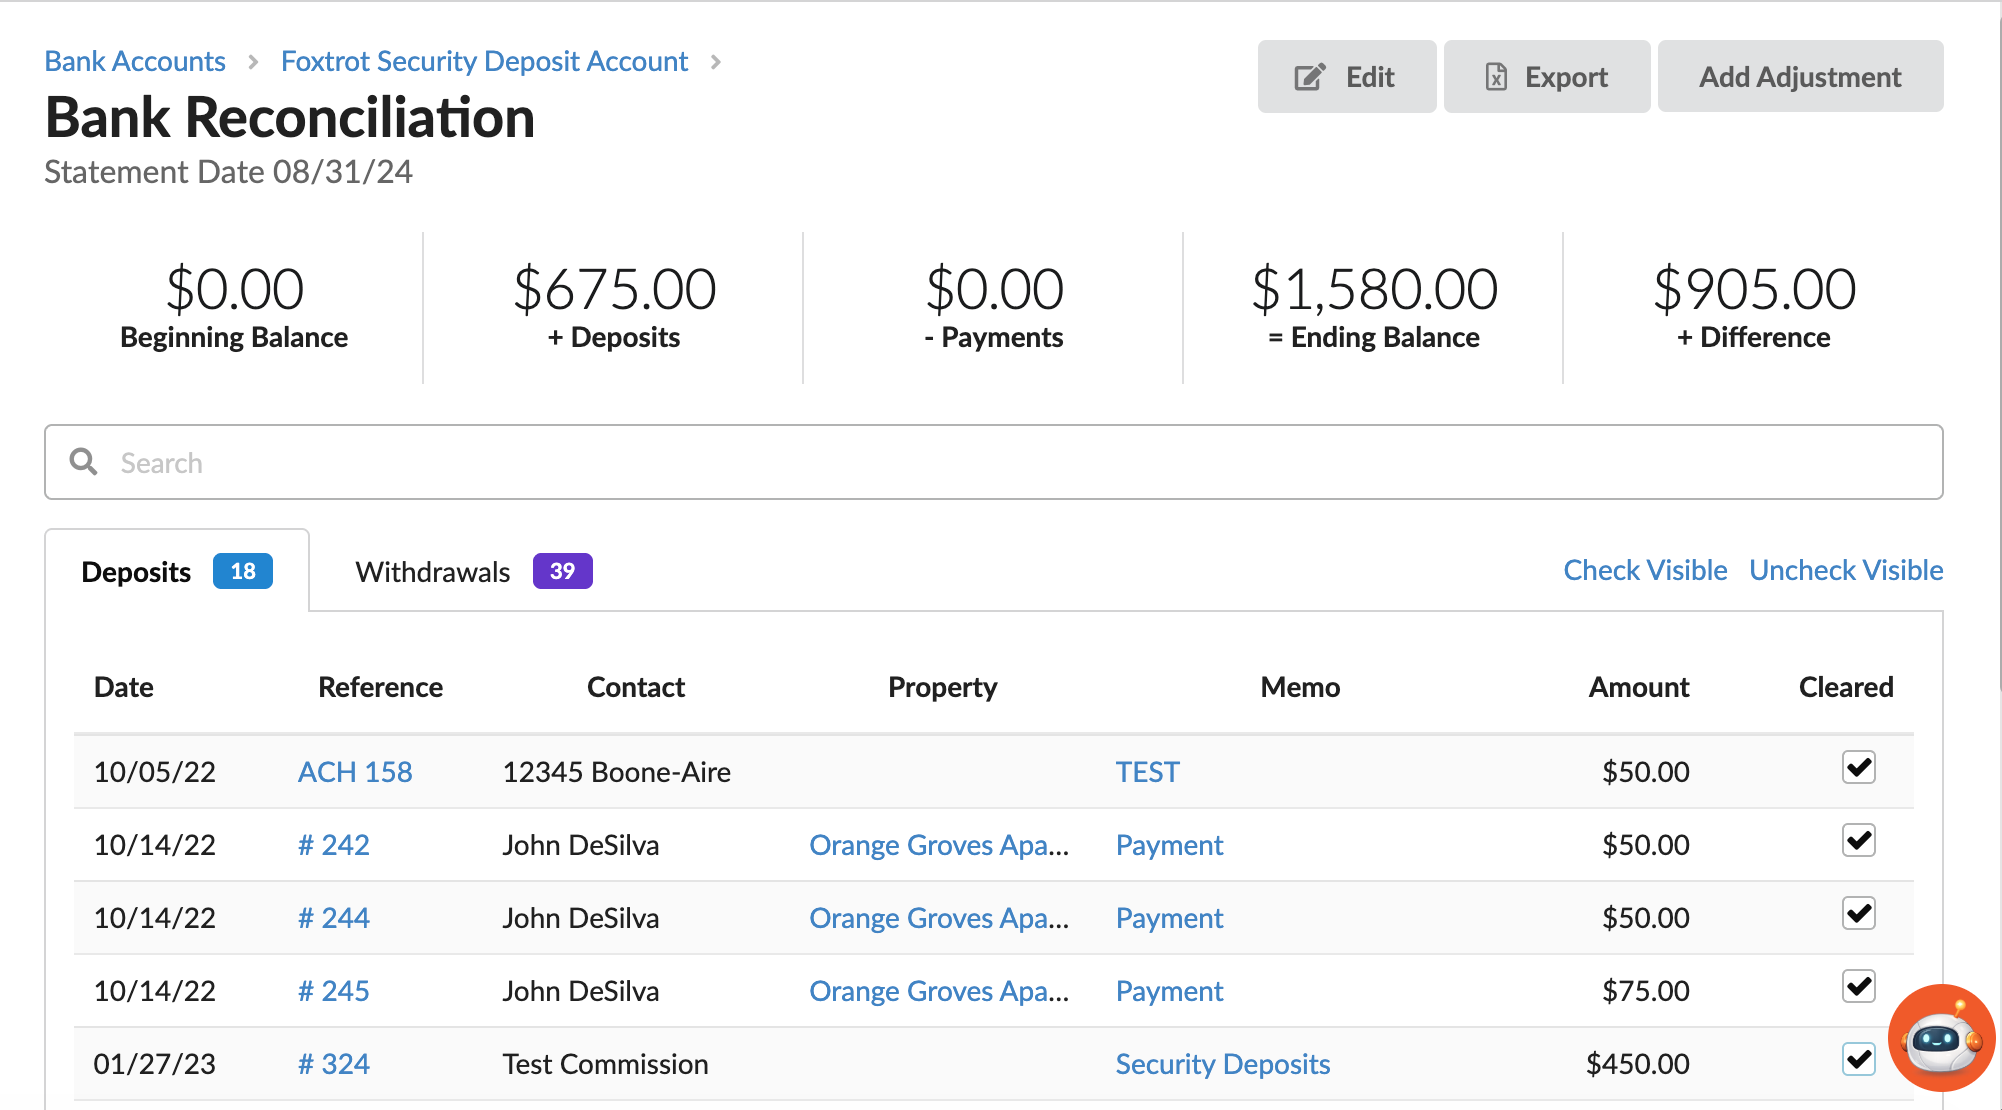
After clicking Next, you are taken to the reconciliation workspace where you match transactions from your bank statement against entries in Revela.
At the top of the page, five progress statistics update in real time as you work:
- Beginning Balance — Your statement beginning balance
- + Deposits — Total of all deposits cleared so far
- - Payments — Total of all payments cleared so far
- = Ending Balance — Your statement ending balance
- + Difference — The remaining difference, which must reach $0.00 before you can finish
Transactions are organized into two tabs: Deposits and Withdrawals. Each tab shows a count of available transactions. For each transaction, compare it against your bank statement and check the Cleared checkbox when you find a match. The progress statistics update immediately.
Each transaction row displays the date, reference number or check number, contact name, associated property, a memo description, and the transaction amount.
To quickly clear or unclear all transactions visible on the current page, use the Check Visible or Uncheck Visible links in the tab menu. The search bar lets you filter transactions by description, contact name, reference number, date, property, or amount, which is especially useful when working with a high volume of transactions.
If you need to record an additional adjustment — such as a bank error correction — click Add Adjustment in the top right to create a new journal entry. If you need to update the statement ending balance or replace the uploaded statement file, click the Edit button in the top right corner.
Finishing a Reconciliation
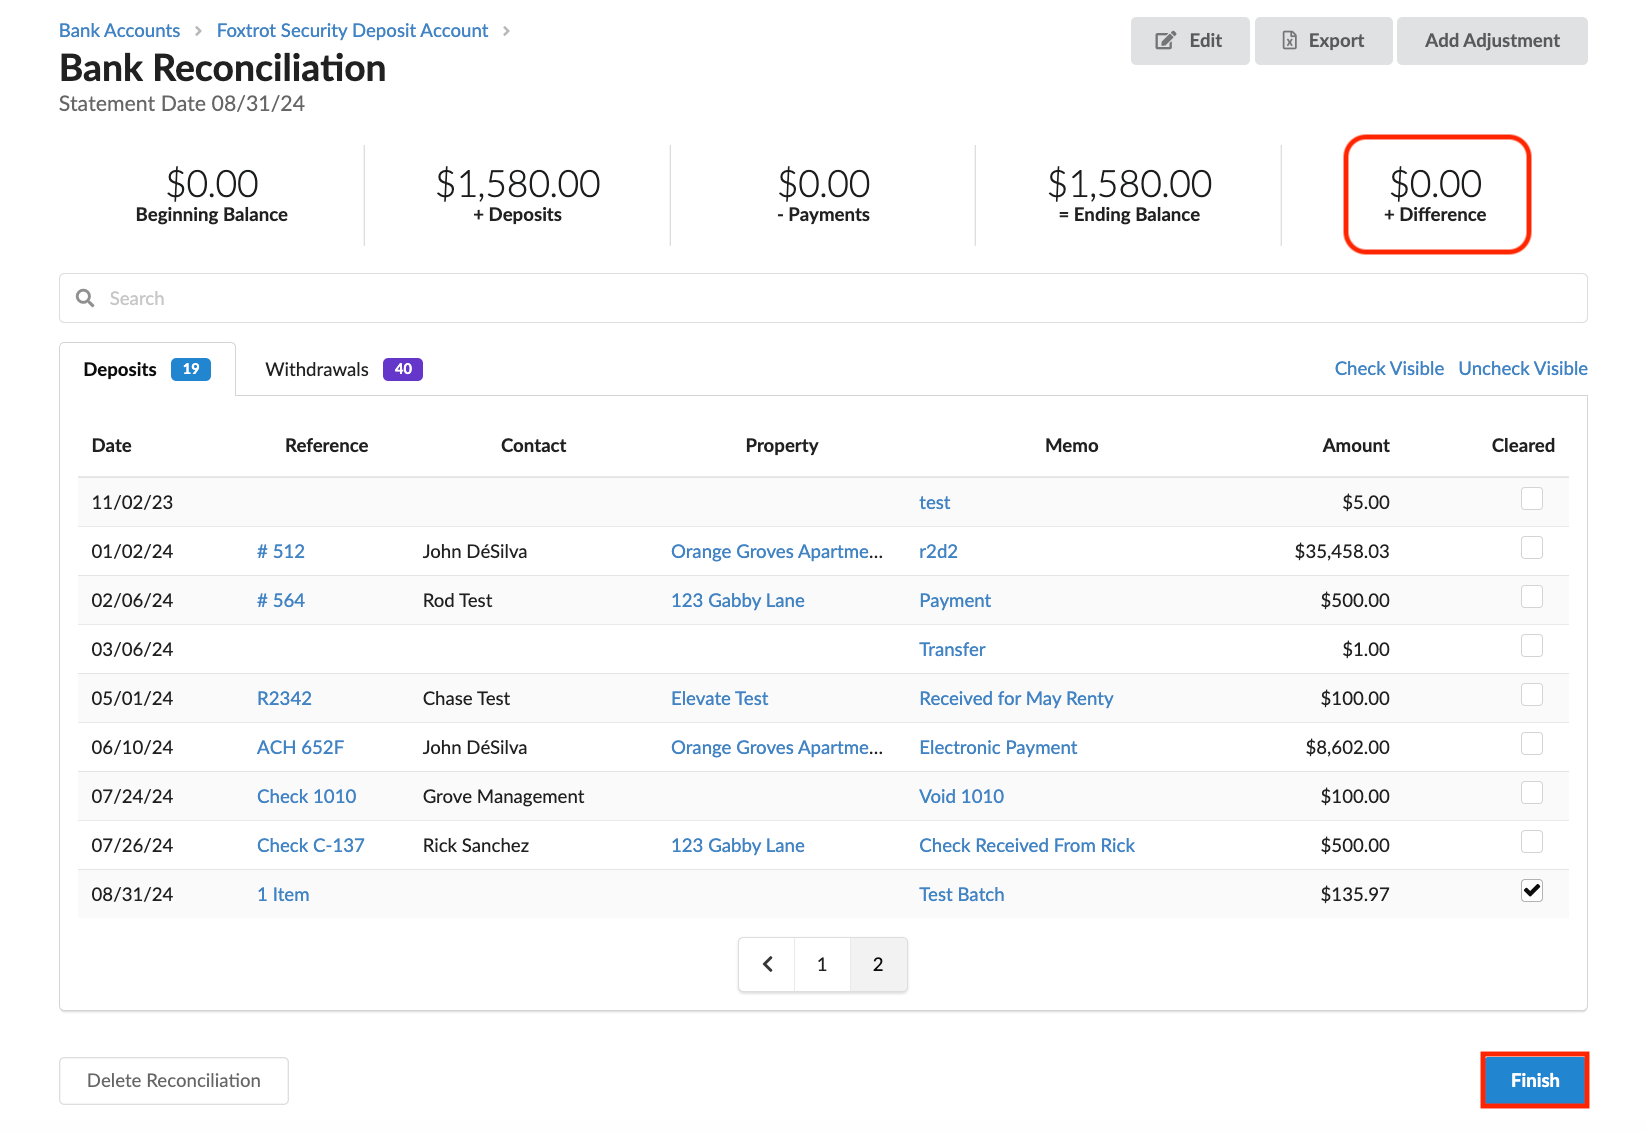
Continue clearing transactions until the Difference shown in the progress statistics reaches $0.00. The Finish button at the bottom of the page remains disabled until the difference is zero.
Once the difference is $0.00, click Finish to complete the reconciliation. Revela records the current date, time, and the name of the user who submitted it.
You are then redirected to the reconciliation summary page, which includes a Summary section showing the Statement Beginning Balance, Cleared Deposits, Less Cleared Payments, Statement Ending Balance, Uncleared Deposits, Less Uncleared Payments, and Register Ending Balance. A Details section lists every cleared transaction with its date, reference, memo, deposit amount, and payment amount.
From the summary page, you can print the reconciliation report, export it as XLSX or PDF, or download the attached statement file if one was uploaded.
Managing Reconciliations
- Discarding a reconciliation in progress – If you need to abandon a reconciliation before finishing, click Cancel at the bottom of the reconciliation workflow. Confirming the "Discard Reconciliation?" prompt will delete the reconciliation and unreconcile all previously cleared transactions.
- Reopening a completed reconciliation – To make changes to a reconciliation that has already been submitted, navigate to Banking, select the bank account, and locate the reconciliation in the Reconciliation History tab. Click the reconciliation's statement date link to open the summary page, then click Reopen. Once confirmed, the reconciliation returns to an in-progress state where you can clear or unclear transactions and make adjustments. When finished, click Finish again to resubmit.
- Removing a completed reconciliation – To permanently delete a completed reconciliation, open the reconciliation summary page as described above and click the Remove button (trash icon) in the top right corner. Confirm the deletion. All transactions that were cleared against the reconciliation will return to an unreconciled state.
- Viewing reconciliation history – Navigate to Banking, select the bank account, and open the Reconciliation History tab, which is displayed by default. The table lists all reconciliations with their Statement Date, Status (Submitted or Pending), the name of the user who completed it, Beginning Balance, Ending Balance, and a download link for any attached statement file.
Tips & Best Practices
- Reconcile monthly. Performing reconciliations promptly after each bank statement arrives helps you catch discrepancies early before they compound.
- Always verify the beginning balance before proceeding. A mismatch between the Statement Beginning Balance in Revela and your bank statement may indicate a problem with a prior reconciliation that needs to be investigated first.
- Enter service charges and interest up front when creating the reconciliation. This ensures the corresponding journal entries are dated on the statement date, keeping your books aligned with the bank's records from the start.
- Use the search bar to find specific transactions quickly, especially when working with a large volume of activity. Filtering by amount or reference number is the fastest way to locate a match.
- The Finish button requires a zero difference. If the difference is not zero, review your cleared items and confirm the statement ending balance was entered correctly before looking for missing or duplicate transactions.