Overview
Purpose: This guide explains how to manage delinquent tenants using the Collections Dashboard in Revela, including sending demand letters, tracking notices, and handling evictions.
Target Audience: Property managers, leasing agents, and collections teams.
Accessing the Collections Dashboard
-
Navigate to Operations (left menu) > Collections (top toolbar)
-
The dashboard will display all tenants with a current balance past the grace period
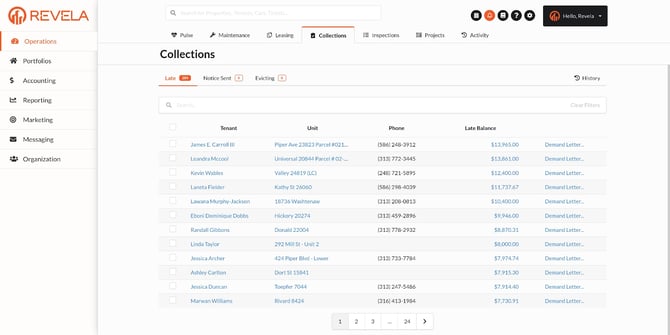
Understanding Collection Statuses
1. Late
-
A tenant is marked Late if they still owe rent after the pre-set grace period has expired
2. Notice Sent
-
Tenants who have received a demand letter through Revela
3. Notice Expired
-
Tenants whose demand letter has expired based on state regulations
-
Example: Michigan demand letters expire after 7 days
-
-
Action Required: Send a new demand letter, which moves the tenant back to Notice Sent status
4. Evicting
-
If a tenant remains delinquent, move them to Evicting status to generate an eviction packet
-
The eviction packet consolidates lease agreements, tenant information, and communication history into a single document for legal proceedings
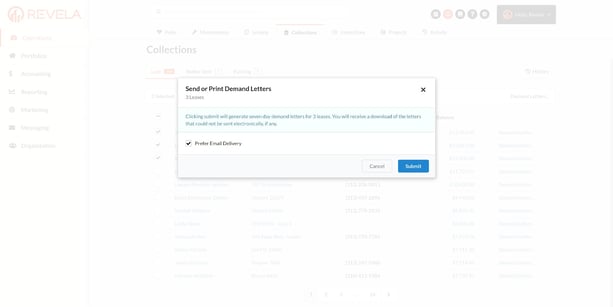
Sending a Demand Letter
You can send demand letters for non-payment of rent in a few ways:
-
Email Delivery (Default Option)
-
The demand letter will be automatically emailed to the tenant
-
-
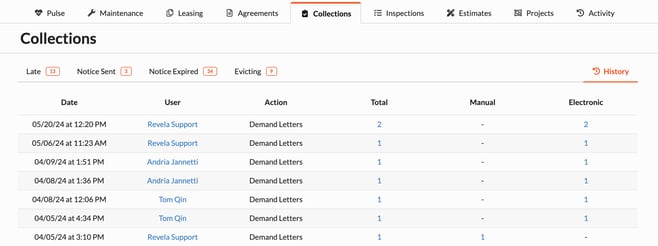
Physical Demand Letter (PDF Download & Mail Option)
-
Generate a demand letter as a PDF to print and mail
-
Find the file in History, where you can see timestamps and the number of demand letters sent
-
-
Mailing via Lob Integration (Optional, Additional Cost)
-
Automate physical mailing through Revela’s integration with Lob
-
Contact your account manager for more details
-
Once submitted, the demand letter is generated and sent, automatically moving the tenant to Notice Sent.
Handling Tenant Payments & Non-Payments
If a Tenant Remits a Partial Payment
-
If a tenant pays over the minimum configured amount but still has an unpaid balance, they will be moved back to the Late column
If a Tenant Does Not Pay the Balance
-
Property managers can select tenants in Notice Sent status and generate an eviction packet for legal processing
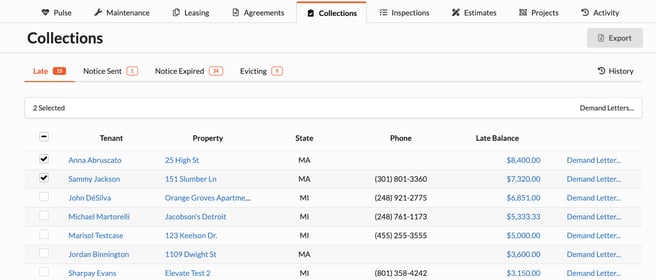
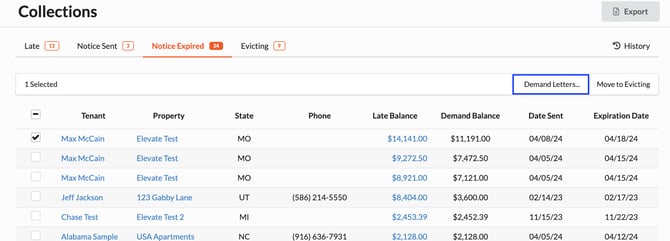
Re-Sending a Demand Letter
-
Select the checkbox next to the delinquent tenant
-
Click Demand Letters in the top-right corner
-
The tenant will receive a new demand letter, and their status will automatically update to Notice Sent
Moving a Tenant to Evictions
-1.png?width=670&height=326&name=Untitled%20design%20(6)-1.png)
Initiating the Eviction Process
-
Select the checkbox next to the tenant in Notice Expired status
-
Click Move to Evicting in the top-right corner
-
This generates an eviction packet, which can be forwarded to legal counsel
-
The tenant is automatically moved from Notice Expired to Evicting status
Contents of the Eviction Packet:
-
Copy of the Demand Letter
-
Signed Lease Agreement
-
Tenant Ledger (payment history)
-
Maintenance History
-
Any other notices or documents
-
All emails and text messages logged in the system
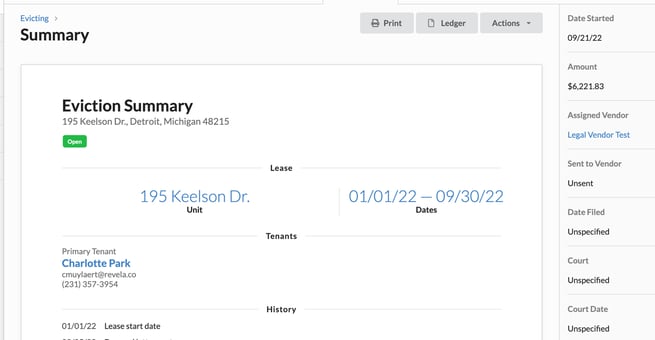
Finalizing the Eviction Process
-
Once the eviction judgment date is entered, Revela will:
-
Automatically start the move-out process
-
Prompt the property manager to schedule an eviction event
-
Allow the eviction to be assigned to legal counsel within Revela
-
Best Practices & Tips
- Use bulk actions to process multiple demand letters at once
- Regularly review the Notice Expired status to ensure follow-ups
- Track payment history to determine if a tenant should be moved back to Late status or processed for eviction
Common Issues & Troubleshooting
Issue 1: Tenants not receiving demand letters
-
Solution: Check the History section to confirm the letter was generated and sent
Issue 2: Unable to move a tenant to evictions
-
Solution: Ensure the Notice Expired status is active before initiating the eviction process
Issue 3: Partial payment made, but tenant is still in Notice Sent
-
Solution: Check if the payment meets the minimum configured amount to update their status automatically