
Adding a New Property
Once an entity exists, properties can be added to it. Property creation follows a guided, multi-step process that walks you through the key details of the property.
To begin, navigate to the portfolio where the property will reside and click Add Property. The first step is the Overview screen, which collects the foundational information about the property.
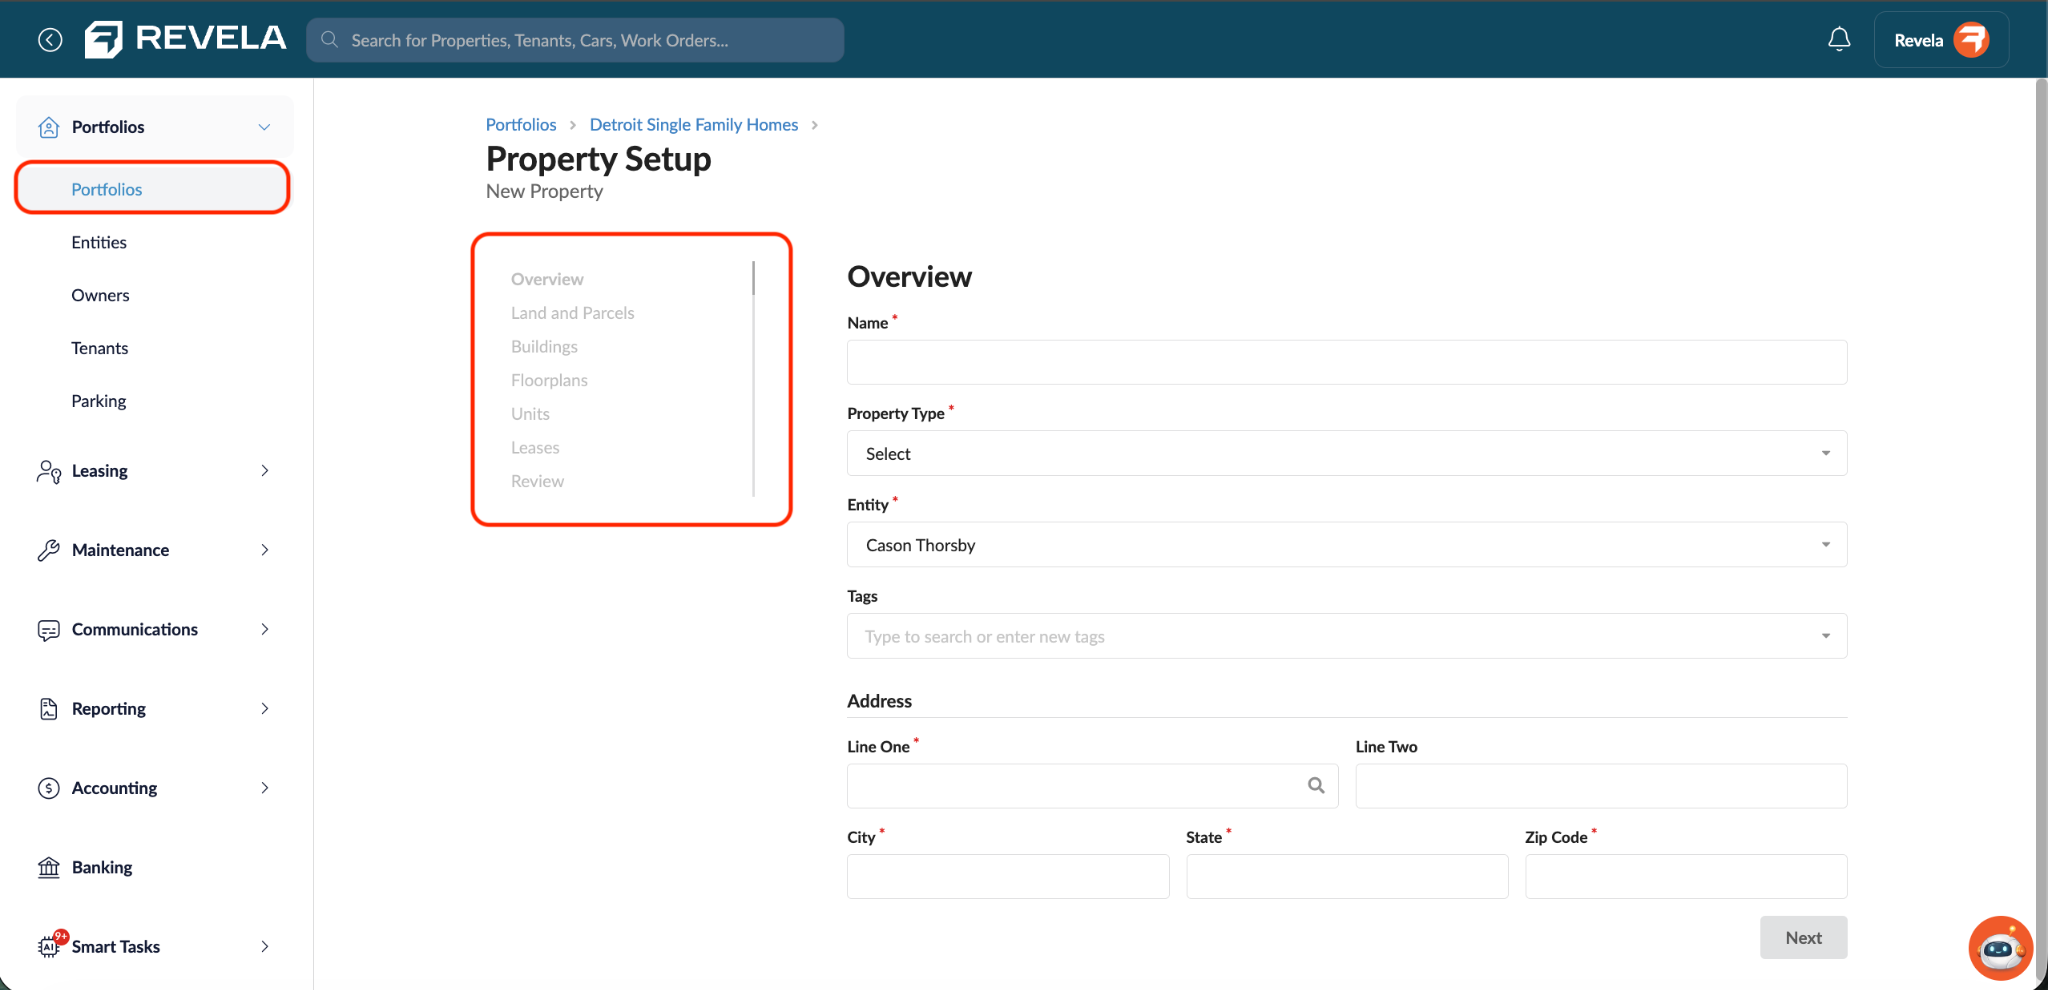
The property creation workflow will prompt the user to enter the following required fields for the property, including:
- Name - This is the display name for the property in Revela.
- Property Type - This field determines how the property is categorized. Available property types include Apartment Complex, Single Family, Mixed Use, and more.
- Selecting the correct property type is important because it influences the setup workflow. For example, single-unit property types like “Single Family” and “Town House” follow a streamlined path, while multi-unit types like “Apartment Complex” and “Multifamily” include additional steps for buildings and unit configuration.
- Entity - Choose the entity that legally owns this property.
- Address - This should reflect the property’s physical location.
After completing the overview, you will advance to the Land and Parcel Information step. Here you can record the Year Built, Date Acquired, and upload a Survey document, if you so choose. If this information is not available or inapplicable, skip to the next relevant section.
The next steps in the setup process vary based on the property type. For multi-unit properties, you will be guided through configuring Buildings and then Units or Floorplans. For single-unit property types, the workflow moves directly to Floorplan configuration, where a default unit is created automatically. Once the setup is finalized, the property is marked as fully configured and appears on the portfolio’s property list.
Configuring the Property After Setup
After a property has been created, additional configuration is available through the property edit page. Navigate to the property and click Actions > Edit to access fields beyond what the initial setup covers.
The edit page includes all of the overview fields (name, type, year built, tags) as well as additional options, including:
- Rental License Expiration Date - This field can be set if applicable to track licensing requirements.
- Preleasing - This checkbox can be enabled for properties that are accepting lease applications before the property is ready for occupancy.
- Notes - This field provides space for internal documentation about the property.
- Utilities - This section allows you to configure each utility type (including Electric, Gas, Water, Sewer, Trash, and Recycling) by selecting a utility vendor and specifying whether the Owner or the Tenant is responsible for each utility.
- This information is useful for lease management and expense tracking.